

Content
A wheel bearing hub assembly unit is a pre-packaged automotive component that combines the wheel hub, one or more sets of ball or tapered roller bearings, and in many modern designs, an integrated wheel speed sensor into a single sealed unit. Its primary function is to allow the wheel and tire to rotate freely around the vehicle's fixed spindle or axle shaft while supporting the full weight of the vehicle and handling the lateral forces generated during cornering. Without a properly functioning hub assembly, a wheel cannot rotate smoothly, safely, or in precise alignment with the steering and suspension geometry.
Older vehicle designs used serviceable bearings — loose bearing races and roller elements packed with grease and held in place by a castle nut — that required periodic repacking and adjustment. The wheel bearing hub assembly unit replaced this approach on most modern passenger cars and light trucks. The sealed unit arrives pre-greased, pre-adjusted, and pre-torqued from the factory, requiring no in-service adjustment and offering a straightforward bolt-on replacement when worn. The integrated ABS sensor — connected by a wiring harness to the vehicle's anti-lock brake system — reads a tone ring on the hub to report wheel speed, making the hub assembly a critical part of both the rolling chassis and the electronic safety systems.
Generation Types: How Hub Assembly Design Has Evolved
The automotive industry classifies wheel bearing hub assemblies into three generations, each reflecting advances in packaging, integration, and ease of service. Understanding which generation your vehicle uses is essential before purchasing a replacement unit.
Generation 1 (GEN1)
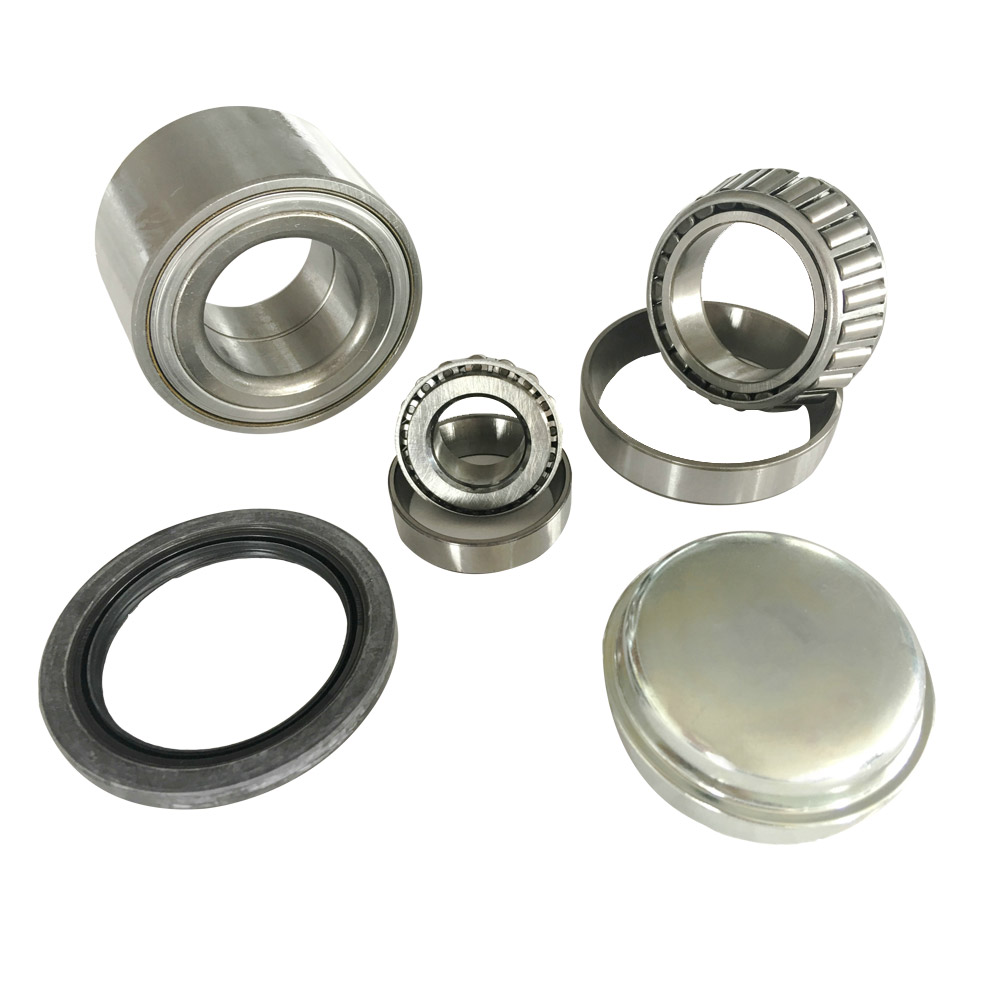
First-generation hub assemblies introduced the sealed double-row angular contact ball bearing concept but kept the bearing unit separate from the hub flange. The bearing outer ring presses into the knuckle bore, and the hub presses through the bearing inner ring. Replacing a GEN1 unit typically requires a hydraulic press and specialized adapters, making it a workshop-level task. These units are common on older vehicles from the 1990s and early 2000s and are still found on the rear axles of many economy cars today.
Generation 2 (GEN2)
Second-generation assemblies integrate the outer bearing ring with the hub flange into one forged piece, bolting directly to the steering knuckle with three or four bolts. No press is required for removal or installation, significantly simplifying the replacement procedure. GEN2 units are still widely used on the rear axles of front-wheel-drive vehicles and on some front axle applications. They typically do not include a built-in wheel speed sensor, relying instead on a separate sensor mounted in the knuckle.
Generation 3 (GEN3)
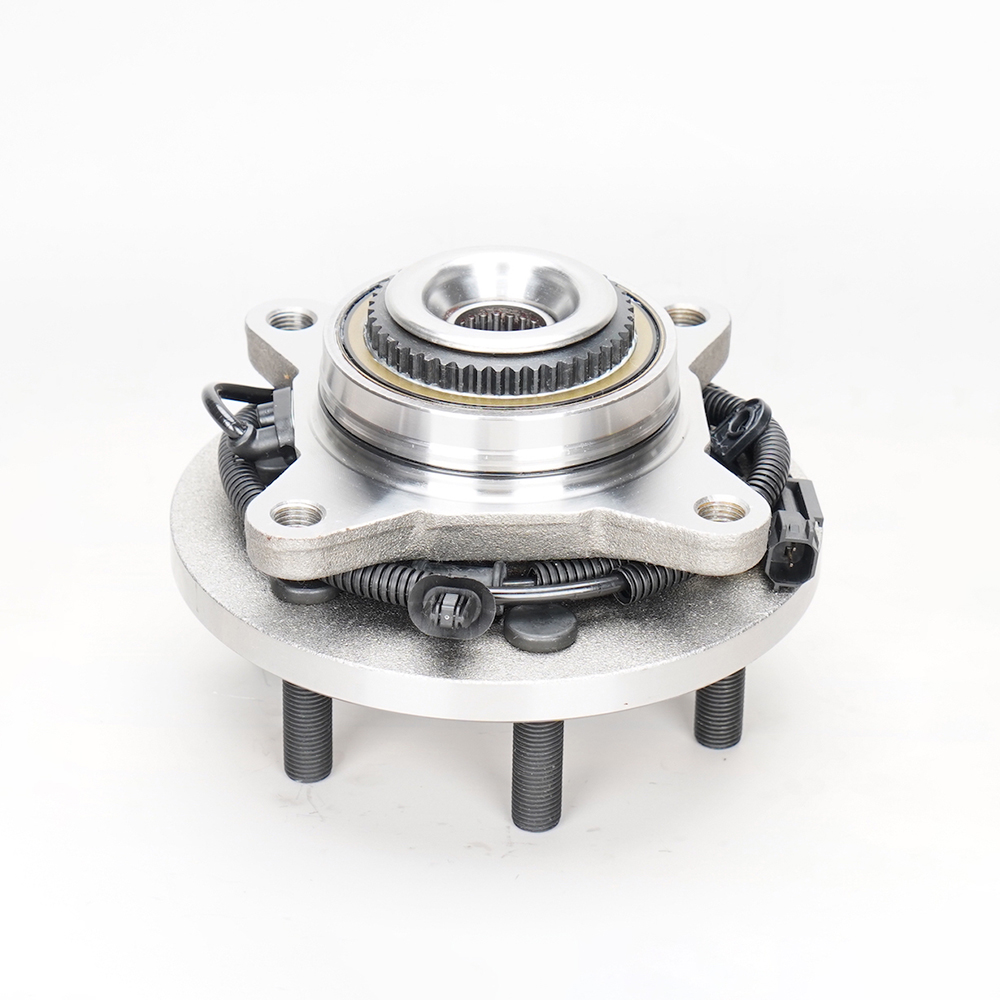
Third-generation hub assemblies are the most fully integrated design, combining the hub flange, both bearing inner and outer rings, and an active ABS tone ring with sensor into a single flanged unit. GEN3 assemblies bolt directly to the knuckle and also connect to the CV axle shaft via a splined interface, making them the standard on driven front and rear axles of modern cars and SUVs. Replacement is straightforward from a tooling standpoint but requires careful torque specification adherence, particularly on the central axle nut, which is often a single-use, prevailing-torque fastener.
Warning Signs That Your Hub Assembly Is Failing
Wheel bearing hub assemblies do not fail instantaneously in most cases. They degrade progressively, giving drivers a window of time to identify the problem before it becomes dangerous. Recognizing the early and late-stage symptoms is critical to avoiding wheel separation or brake system failure.
- Humming or grinding noise: The most common and earliest symptom is a low-frequency humming or rumbling sound that changes pitch with vehicle speed. Unlike tire noise, which stays relatively constant in pitch, a failing bearing hum typically intensifies or shifts noticeably when you change lanes and transfer lateral load from one side of the vehicle to the other. The noise comes from the affected corner — if it gets louder when you steer gently left, the right-side bearing is likely the culprit, and vice versa.
- Vibration through the steering wheel or seat: As bearing wear progresses and the internal clearance increases, the rolling elements begin to operate with looseness. This looseness translates into vibration that can be felt through the steering column on front-axle failures or through the seat and floor on rear-axle failures. The vibration is often speed-dependent and may temporarily improve at certain velocity ranges.
- Uneven or accelerated tire wear: Excessive play in the hub bearing allows the wheel to operate outside its designed camber and toe angles, causing uneven contact pressure across the tire tread. If you notice one-sided shoulder wear or unusual cupping on a tire that was recently rotated, inspect the hub assembly at that corner before assuming the issue is an alignment problem.
- ABS warning light or stability control fault codes: When an integrated wheel speed sensor fails — either because the bearing's tone ring is damaged or because moisture has corroded the sensor element — the ABS and electronic stability control systems lose the wheel speed signal from that corner. The result is a warning light on the dashboard and potentially compromised emergency braking performance. Fault codes C0035 through C0050 (by corner) in the OBD-II system often point directly to a hub-mounted sensor fault.
- Looseness or clunking during cornering: A severely worn hub assembly may exhibit audible clunking on sharp turns as the internal components move beyond their design tolerances. At this stage, the bearing is at risk of catastrophic failure and the vehicle should not be driven until the assembly is replaced.
How to Choose the Right Replacement Hub Assembly
Selecting the correct wheel bearing hub assembly requires more than matching the bolt pattern. Several specifications must align precisely with your vehicle's original equipment to ensure safe operation and compatibility with the ABS system. The table below summarizes the key parameters to verify:
| Specification | Why It Matters | How to Verify |
| Bolt Pattern (PCD) | Must match wheel stud count and circle diameter | Check OEM part number or measure original hub |
| ABS Sensor Type | Active vs. passive sensors are not interchangeable | Confirm via vehicle VIN or OEM part lookup |
| Flange Diameter | Affects brake rotor seating and hat fitment | Measure OEM unit or cross-reference fitment guide |
| Spline Count (driven axles) | Must match CV axle shaft spline specification | Count splines on axle or use VIN-based lookup |
| Load Rating | Critical for trucks and vehicles with towing duty | Match or exceed OEM dynamic load capacity (kN) |
Brand quality matters significantly with hub assemblies. Economy-tier units from unknown manufacturers frequently use lower-grade bearing steel, less precise internal geometry, and inferior sealing lips, leading to premature failure — sometimes within 20,000 miles. Established brands such as Timken, SKF, Moog, and FAG manufacture to tighter tolerances and subject their units to fatigue life testing that matches or exceeds OEM standards. While premium brands cost more upfront, they typically deliver two to three times the service life of budget alternatives under equivalent operating conditions.
Replacement Process and Critical Torque Specifications
Replacing a GEN2 or GEN3 wheel bearing hub assembly is within the capability of an experienced home mechanic with basic tools, a torque wrench, and access to vehicle-specific torque specifications. The general procedure involves raising and securing the vehicle, removing the wheel and tire, disconnecting the ABS sensor harness, removing the brake caliper and rotor, unbolting the hub assembly from the knuckle, and withdrawing the unit from the CV axle spline. Installation reverses these steps, but several torque values are non-negotiable for safety.

The hub-to-knuckle bolts must be torqued to the manufacturer's specification — typically between 65 and 100 ft-lbs depending on the vehicle — and in some designs, thread-locking compound is required. The most critical fastener is the central axle nut, which clamps the hub assembly onto the CV axle and preloads the bearing. This nut is almost always a single-use prevailing torque design that should never be reused once removed. Torque specifications for axle nuts range widely, from 150 ft-lbs on small economy cars to over 250 ft-lbs on trucks and SUVs. Using an impact wrench to approximate this value is not acceptable — a calibrated torque wrench or torque stick must be used for final tightening. Under-torquing the axle nut allows the hub to move on the shaft, accelerating wear and potentially causing the nut to back off. Over-torquing can preload the bearing excessively, causing rapid heat generation and premature failure.
After installation, always clear any stored ABS or stability control fault codes using an OBD-II scanner, then perform a test drive to confirm the noise is eliminated and all warning lights remain off. Recheck the hub bolt torque after the first 50 to 100 miles of driving, as thermal cycling and initial settling can cause slight relaxation in the fastener clamp load.
