

Content
- 1 What a Wheel Hub Spindle Kit Contains and Why It Matters
- 2 How the Spindle and Hub Assembly Work Together
- 3 Types of Wheel Hub Spindle Kits by Application
- 4 Key Specifications to Match When Selecting a Kit
- 5 Signs That a Spindle Kit Replacement Is Needed
- 6 Step-by-Step Overview of Spindle Kit Installation
- 7 Quality and Brand Considerations When Purchasing a Spindle Kit
- 8 Maintenance Intervals and Long-Term Care After Installation
What a Wheel Hub Spindle Kit Contains and Why It Matters
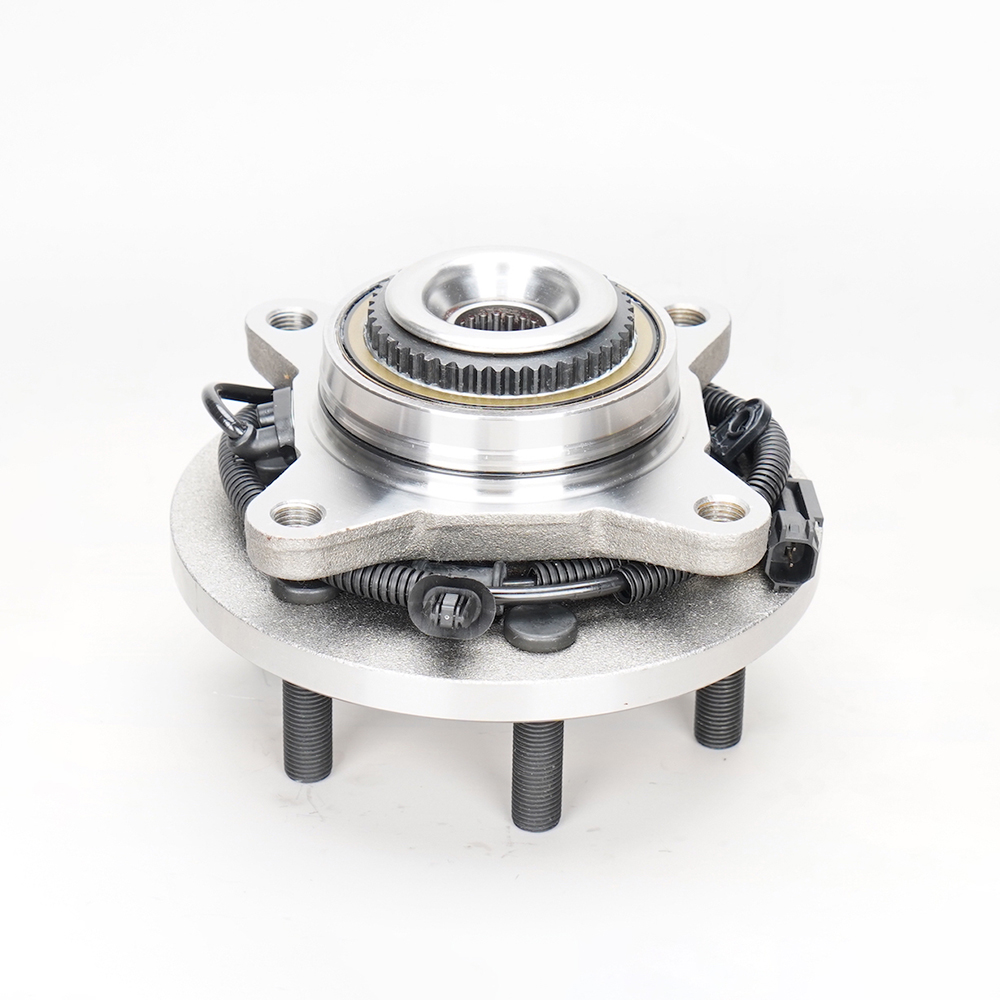
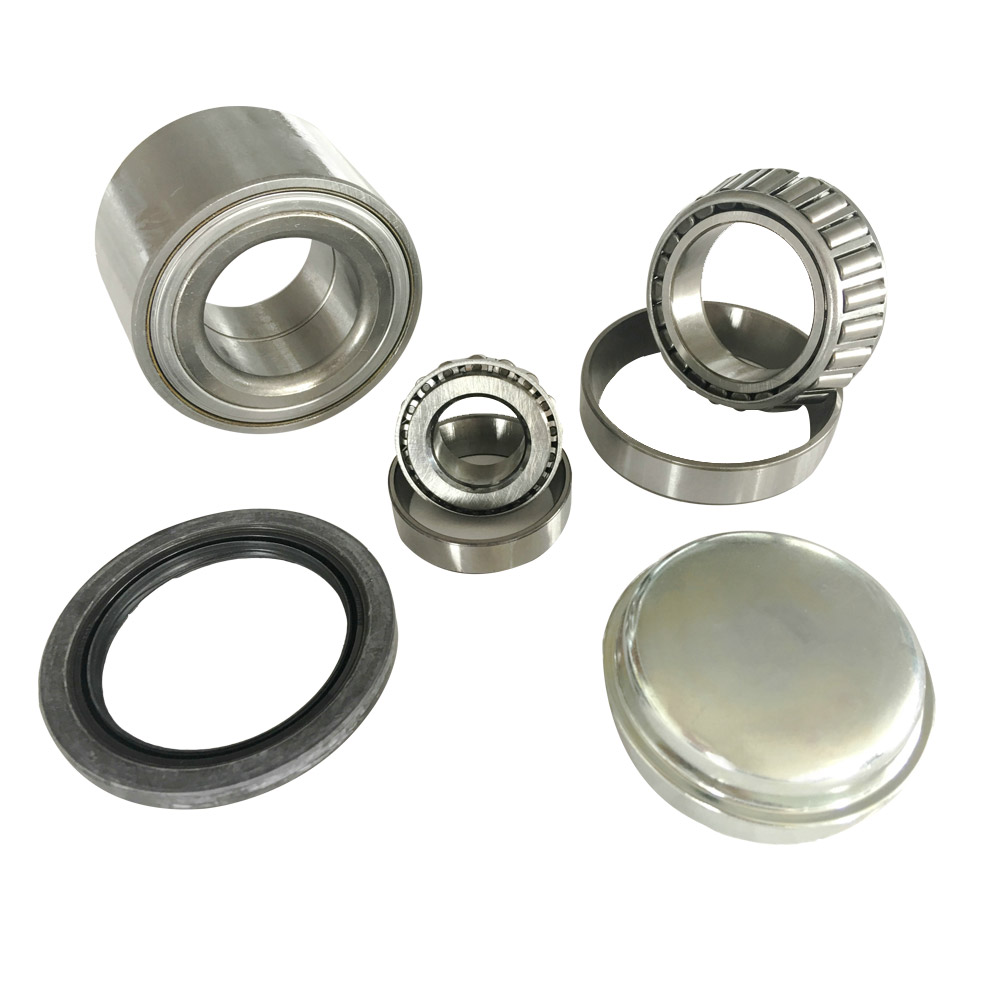
A wheel hub spindle kit is a collection of precision-machined components that together form the rotating and load-bearing interface between a vehicle's wheel and its suspension or axle assembly. Depending on the application — passenger car, light truck, trailer, ATV, or heavy equipment — the specific contents of a kit vary, but the core components typically include the spindle shaft itself, one or more tapered roller bearings or ball bearings, inner and outer bearing races, bearing seals, a spindle nut and lock washer, a cotter pin or retention clip, a dust cap or grease cap, and in some kits, a pre-assembled hub unit that integrates the bearing directly into a flanged housing ready for installation.
The spindle is the stationary or semi-stationary shaft around which the wheel hub rotates, supported by the bearings packed within the hub assembly. It transmits braking forces, lateral cornering loads, and vertical weight from the vehicle into the suspension knuckle or axle tube, while the hub and wheel rotate freely around it. When any component in this assembly wears, corrodes, or fails — whether a pitted bearing race, a deteriorated seal leaking grease, or a cracked spindle nut — the consequences range from excessive tire wear and vibration to complete wheel separation at speed. A quality spindle kit addresses all wear components in a single purchase, ensuring that the entire assembly is restored to original specification rather than leaving worn secondary components in place alongside new primary parts.

How the Spindle and Hub Assembly Work Together
Understanding the mechanical relationship between the spindle and hub clarifies why kit completeness matters and what failure modes to watch for during inspection and replacement. In a conventional non-driven front axle or trailer axle, the spindle is bolted or welded rigidly to the knuckle or axle beam and does not rotate. The wheel hub slides over the spindle on two sets of tapered roller bearings — an inner bearing positioned at the larger diameter section near the flange, and an outer bearing positioned toward the spindle tip. These two bearings handle both radial loads from the vehicle weight and axial thrust loads from cornering and braking.
The spindle nut at the outer end of the spindle clamps the outer bearing race in place and sets the bearing preload — the precise amount of axial compression applied to the bearing stack. Correct preload is critical: too loose and the hub develops play that accelerates bearing wear and causes brake rotor runout; too tight and the bearings run hot, fail prematurely, and in extreme cases seize. Between the inner bearing and the axle flange or seal surface, a grease seal prevents contamination from entering the bearing cavity and stops bearing lubricant from migrating outward onto the brake components, where it would cause severe brake performance degradation.
Types of Wheel Hub Spindle Kits by Application
Spindle kits are manufactured for a very wide range of vehicle and equipment types, and compatibility between the kit and the specific application is non-negotiable. Using components from an incompatible kit — even one that appears dimensionally similar — risks bearing overload, seal failure, and improper spindle nut engagement that can lead to catastrophic wheel loss.
Trailer Spindle Kits
Trailer spindle kits are among the most widely available and frequently replaced, covering boat trailers, utility trailers, horse trailers, and RV applications. They are designed around standardized spindle diameters and bearing sizes — most commonly the L68149/L68111 inner bearing and L44649/L44610 outer bearing combination for lighter trailers, and the L68149/LM67048 combination for heavier duty applications. Trailer kits frequently include a bearing buddy or EZ-Lube grease fitting adapter that allows bearing repacking without wheel removal — a significant maintenance convenience for trailers that see frequent water submersion during boat launching.
Passenger Car and Light Truck Kits
For passenger vehicles and light trucks with conventional serviceable front spindles — most common on older body-on-frame trucks and SUVs rather than modern unibody vehicles — spindle kits are application-specific to the make, model, and year. These kits accommodate the larger bearing sizes needed to support greater vehicle weights and the dynamic loading from braking and cornering at highway speeds. Many modern passenger vehicle applications use pre-assembled hub bearing units (also called hub assemblies or wheel bearing hubs) that integrate the bearing, hub flange, and ABS sensor ring into a single sealed unit, replacing the conventional separate spindle-and-bearing arrangement entirely.
ATV and Off-Road Vehicle Kits
ATV and off-road vehicle spindle kits must handle impact loads, mud and water contamination, and highly variable load directions that conventional road vehicle spindles never encounter. These kits often feature heavier-duty sealing arrangements, greater bearing radial clearance to accommodate shock loads, and spindles machined from higher-strength alloy steels. Some performance ATV spindle kits include upgraded chromoly steel spindles that are stronger and more impact-resistant than the original equipment parts they replace, making them popular upgrades for vehicles used in aggressive trail riding or racing.
Heavy Equipment and Agricultural Kits
Spindle kits for tractors, combines, trailers with GVWR above 10,000 lbs, and construction equipment involve significantly larger bearing sizes, heavier spindle forgings, and more complex sealing systems. These kits are application-specific to equipment make and model, and the bearings involved — typically large tapered roller bearing sets such as the LM501349/LM501310 or HM518445/HM518410 series — require professional installation tools and torque specifications that differ substantially from light-duty applications.
Key Specifications to Match When Selecting a Kit
Selecting a wheel hub spindle kit requires verifying several technical parameters to ensure the replacement components are fully compatible with the vehicle or equipment and meet the load and performance requirements of the application.
| Specification | What to Verify | Why It Matters |
| Spindle Diameter | Inner and outer journal diameters in mm or inches | Determines bearing bore compatibility |
| Bearing Part Numbers | Industry-standard cup and cone numbers (e.g., LM67048) | Ensures correct load rating and geometry |
| Bolt Circle / Stud Pattern | Number of studs and bolt circle diameter | Must match wheel and brake drum/rotor |
| Spindle Thread Size | Thread diameter and pitch for spindle nut | Ensures correct nut engagement and preload |
| Axle Flange Dimensions | Flange diameter, thickness, and mounting hole pattern | Must match brake backing plate and axle beam |
| Load Rating (GAWR) | Gross Axle Weight Rating per spindle in lbs or kg | Kit must exceed application load requirements |
| Seal Dimensions | Inner diameter, outer diameter, and seal width | Incorrect seals allow grease loss and contamination |
Signs That a Spindle Kit Replacement Is Needed
Recognizing the symptoms of a failing spindle or hub bearing assembly allows timely replacement before minor wear becomes a safety-critical failure. Several distinct warning signs indicate that inspection and likely replacement of the spindle kit components is overdue.
- Wheel bearing noise: A rhythmic growling, humming, or rumbling sound that changes pitch with vehicle speed — and often varies when turning left or right as load shifts between bearings — is the most recognizable indicator of a worn wheel bearing. The noise typically originates from pitted or spalled bearing races where the rolling elements no longer run smoothly.
- Excessive wheel play: With the vehicle safely supported on jack stands, grasp the wheel at 12 and 6 o'clock and attempt to rock it in and out. Any detectable play — typically more than 0.001 to 0.005 inches on a properly adjusted tapered roller bearing — indicates worn bearings, a loose spindle nut, or a worn spindle journal surface.
- Grease on the wheel interior or brake components: Grease contamination on the inside of the wheel, the brake drum interior, or the brake pads and rotor indicates a failed inner seal. Beyond the bearing damage this causes, grease-contaminated brake components require immediate replacement as they drastically reduce braking effectiveness.
- Visible spindle damage: During any hub removal for bearing inspection, examine the spindle journal surfaces for scoring, corrosion pitting, or raised material at the bearing seat areas. A damaged spindle surface accelerates wear on new bearings and seals, making spindle replacement a prerequisite for a durable repair rather than an optional upgrade.
- Wheel vibration or brake pulsation: Hub runout caused by worn or improperly preloaded bearings produces brake rotor or drum runout that manifests as pedal pulsation during braking and steering wheel vibration at speed, symptoms that are frequently misdiagnosed as rotor or tire issues before the bearing root cause is identified.
Step-by-Step Overview of Spindle Kit Installation
Installing a wheel hub spindle kit correctly requires methodical preparation, the right tools, and strict adherence to torque and preload specifications. Rushing any stage of the process risks bearing damage, seal failure, or incorrect preload that will cause premature failure of the new components.
Preparation and Disassembly
Begin by safely supporting the vehicle or trailer on quality jack stands at appropriate lift points. Remove the wheel, then the brake drum or caliper and rotor as applicable. Pry off the dust cap carefully to avoid distorting it. Remove the cotter pin, then the spindle nut and washer. Slide the hub assembly off the spindle, catching the outer bearing as it comes free. Remove the inner seal using a seal puller or flat bar, then drive out the inner and outer bearing cups using a bearing driver or brass drift. Clean the hub bore, spindle journal surfaces, and all mating faces thoroughly before any new components are installed.
Bearing and Seal Installation
Drive the new bearing cups into the hub bore using a bearing race driver sized to contact the outer edge of the cup evenly around its full circumference. An improperly seated cup — driven in cocked or seated on one side — will fail rapidly under load. Pack the new bearing cones thoroughly with wheel bearing grease, working it through the cage and into all spaces between the rolling elements. Install the inner bearing cone, then drive the new inner seal squarely into the hub bore to the depth specified in the service manual. Apply a thin film of grease to the seal lip before installation to prevent dry running during initial startup.
Hub Installation and Bearing Preload Adjustment
Slide the packed hub assembly onto the spindle, install the outer bearing cone, washer, and spindle nut. The bearing preload adjustment procedure varies by application but typically follows this sequence for tapered roller bearings: tighten the spindle nut to 50 ft-lbs while rotating the hub to seat the bearings, then back off the nut one full turn, re-tighten finger tight, then back off again to align the nearest cotter pin hole. This results in zero to slight preload that allows the hub to rotate freely with no perceptible play. Install a new cotter pin through the spindle nut and spindle, bend the legs to secure it, then install the dust cap with light taps from a rubber mallet to avoid distorting its sealing flange.
Quality and Brand Considerations When Purchasing a Spindle Kit
The wheel hub spindle kit market includes products spanning a wide quality range, from OEM-equivalent components manufactured to original equipment specifications to economy kits using lower-grade steel alloys, reduced bearing clearances, and inferior seal materials. For safety-critical wheel end components, the cost difference between a quality kit and a budget alternative is rarely justified by the savings.
- Bearing quality indicators: Look for bearings from recognized manufacturers such as Timken, SKF, NSK, or FAG, or OEM-equivalent products that specify the bearing's dynamic load rating (Cr) and static load rating (C0r). These ratings should exceed the calculated loads for the application with an adequate safety factor.
- Spindle material specification: Quality spindles are forged from medium-carbon or alloy steel and heat-treated at the journal surfaces to achieve the hardness needed to resist bearing race fretting and wear. Confirm that the kit supplier can provide material and heat treatment specifications, particularly for high-load or performance applications.
- Seal material and design: Premium kits use nitrile (NBR) or fluoroelastomer (FKM/Viton) lip seals rated for the expected operating temperature and compatible with the grease type used. Single-lip seals are adequate for light-duty applications, while double-lip or triple-lip seal designs provide superior contamination exclusion for off-road, marine, and agricultural environments.
- Kit completeness: Verify that the kit includes every component needed for a complete restoration — spindle, both bearing sets with cups and cones, seal, spindle nut, lock washer, cotter pin, and dust cap. Discovering a missing component partway through installation, with the old parts already discarded, creates unnecessary delays and the risk of reusing worn hardware.
Maintenance Intervals and Long-Term Care After Installation
Installing a new wheel hub spindle kit is not a permanent fix that can be forgotten. Regular maintenance — particularly bearing inspection and grease replenishment — is essential for achieving the full service life that quality components are capable of delivering. For trailer applications, bearing inspection and regreasing every 12,000 miles or annually — whichever comes first — is a widely recommended interval, with more frequent inspection warranted for trailers that are regularly submerged during boat launching, as water intrusion after each immersion displaces grease and initiates corrosion in the bearing cavity within days.
For passenger vehicle and truck applications, the service interval for serviceable front wheel bearings is typically every 30,000 to 50,000 miles depending on the manufacturer's specification and operating conditions. Always use a grease type compatible with the original specification — mixing lithium-complex, polyurea, and calcium sulfonate greases can cause accelerated breakdown of the lubricant film at the bearing contact surfaces. After any hub reassembly, a short low-speed test drive followed by a temperature check at the hub face using an infrared thermometer — a properly adjusted hub should reach equilibrium below 160°F (71°C) under normal driving conditions — confirms that preload and grease quantity are within acceptable limits before returning the vehicle to full service.
