

Content
- 1 What a Wheel Bearing Hub Assembly Unit Actually Contains
- 2 Recognizing Failure: Symptoms at Each Stage of Deterioration
- 3 Diagnostic Methods for Confirming Hub Assembly Failure
- 4 What to Evaluate When Buying a Replacement Hub Assembly
- 5 Installation Procedure and Critical Torque Specifications
- 6 Factors That Affect Hub Assembly Service Life
The wheel bearing hub assembly unit is one of the most structurally critical components on any road vehicle. It connects the wheel to the suspension system, carries the entire static and dynamic load of the vehicle at each corner, and — on driven axles — transmits engine torque to the road surface while allowing the wheel to rotate with minimal friction. On vehicles equipped with ABS, the hub assembly also houses the tone ring or magnetic encoder ring that the wheel speed sensor reads to monitor rotational velocity. Despite this multi-functional importance, wheel bearing hub assemblies are frequently overlooked during routine maintenance until failure symptoms become impossible to ignore. By that stage, what began as an early-stage bearing wear problem has often progressed to a safety-critical condition that increases stopping distances, compromises steering precision, and risks catastrophic wheel separation in extreme cases. This guide covers how hub assemblies work, how to identify failure at every stage, what to look for when purchasing replacements, and how to approach installation correctly.
What a Wheel Bearing Hub Assembly Unit Actually Contains
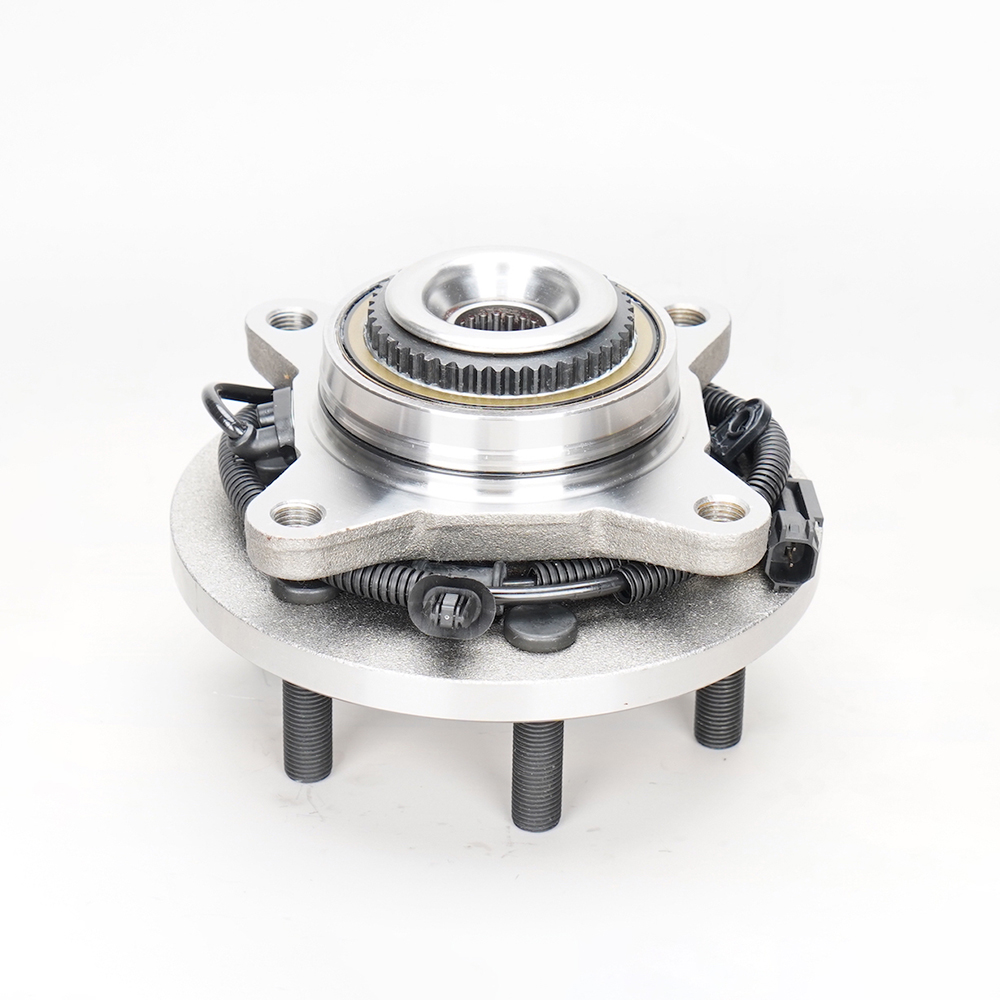
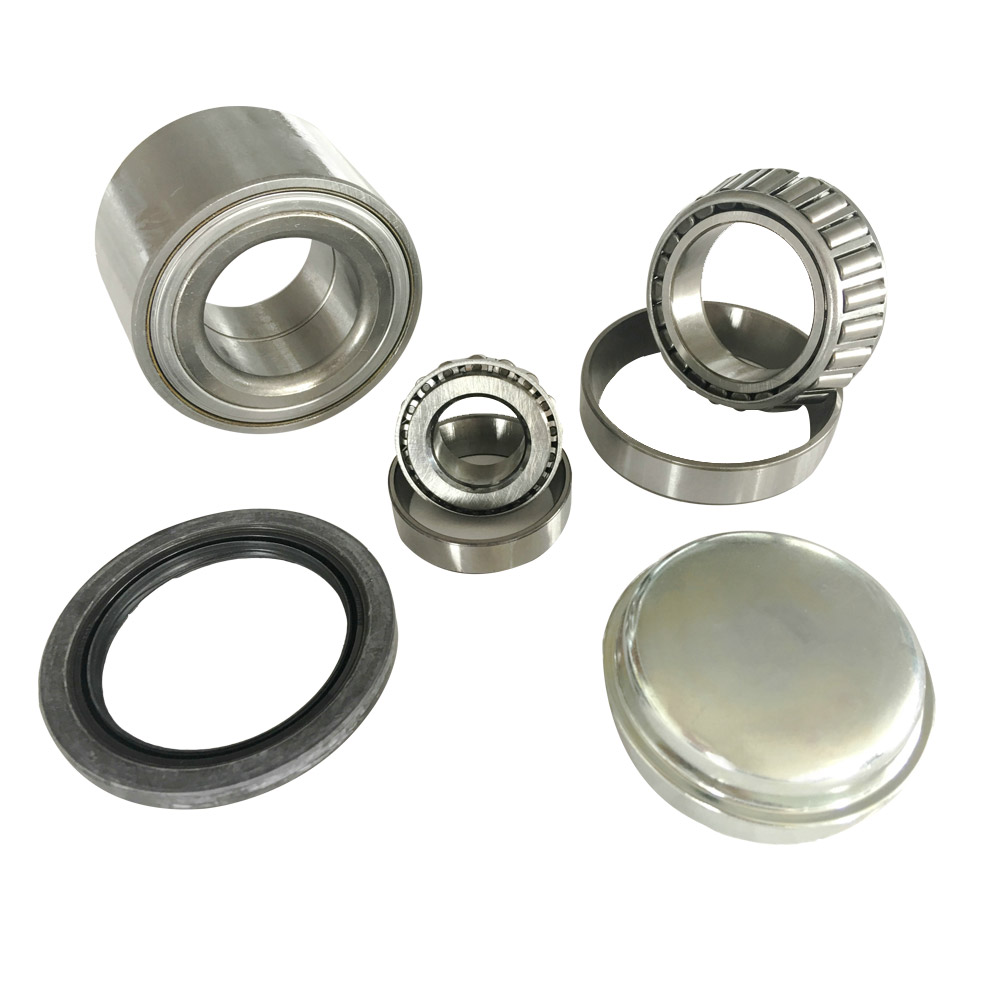
Modern wheel bearing hub assemblies — often called hub bearing units or HBUs — are pre-assembled, pre-greased, and pre-set units that integrate multiple components into a single sealed module. This design replaces the older serviceable bearing arrangement, where separate inner and outer tapered roller bearings, a spindle, seals, and a castellated nut required individual adjustment and periodic repacking with grease.
A typical third-generation hub assembly unit contains the following integrated elements:
- Inner and outer bearing rings (races): Precision-ground hardened steel rings that form the raceways along which the rolling elements travel. The outer ring typically bolts to the steering knuckle or suspension upright; the inner ring rotates with the wheel hub flange.
- Rolling elements: Most hub assemblies use angular contact ball bearings in a double-row configuration. The angular contact geometry allows the bearing to carry both radial loads (vehicle weight) and axial loads (cornering forces) simultaneously — a requirement that straight roller bearings cannot fulfill.
- Wheel hub flange: The machined flange to which the brake rotor and wheel are bolted via wheel studs. The flange must maintain precise runout tolerances — typically below 0.05 mm — to prevent brake pedal pulsation and tire vibration.
- Integral seals: Multi-lip contact seals on both inboard and outboard sides of the bearing retain grease for life and exclude water, road salt, and contaminants that cause premature bearing wear.
- ABS encoder ring: Either a passive tone ring (a toothed steel ring that interrupts a magnetic field) or an active magnetic encoder (a multipole magnetic ring embedded in the inboard seal) that provides wheel speed data to the ABS/ESC control module.
Generation 1 hub units are non-flange type and require pressing into a separate hub carrier. Generation 2 units have one flanged face for wheel attachment but still require pressing for installation. Generation 3 units — the most common in modern passenger vehicles — have flanges on both sides and bolt directly to the knuckle, making replacement straightforward without a hydraulic press in most cases.
Recognizing Failure: Symptoms at Each Stage of Deterioration
Wheel bearing hub assembly failure is a progressive process that typically unfolds over thousands of miles following the initial damage event — usually contamination ingress, overload from kerb impact, or seal degradation from age. Recognizing symptoms at early and intermediate stages allows repair before the bearing reaches structural failure.

Early Stage: Subtle Noise and Vibration
The first detectable symptom is typically a faint humming or rumbling noise that rises in pitch and volume with vehicle speed. Unlike tire noise — which tends to be consistent across speed ranges and road surfaces — bearing noise characteristically changes with lateral load transfer. A failing left front bearing will produce more noise when cornering right (which loads the left bearing more heavily) and less noise when cornering left. This load-dependent variation is the most reliable early diagnostic indicator and can be detected by gently varying steering input on a quiet road at 40 to 60 mph. Light vibration felt through the floor or seat at highway speeds may also be present at this stage.
Intermediate Stage: Pronounced Noise and Play
As internal bearing wear progresses, the noise becomes louder and more constant across driving conditions. A grinding or growling quality develops as the rolling elements begin riding on degraded raceway surfaces rather than the original hardened and polished steel. At this stage, measurable lateral play may be detectable at the wheel: with the vehicle safely supported on jack stands, grasp the tire at the 9 and 3 o'clock positions and attempt to rock it. Any perceptible movement — even 1 to 2 mm — indicates bearing clearance has exceeded service limits. Also check for play at the 12 and 6 o'clock positions to differentiate bearing play from ball joint or tie rod end play.
Late Stage: ABS Faults and Handling Degradation
In the late failure stage, internal clearance has increased to the point where the ABS encoder ring is no longer maintaining consistent position relative to the wheel speed sensor. Intermittent or permanent ABS warning lights appear on the dashboard, and the ABS system may activate inappropriately during normal braking. Steering feel becomes vague or pulls to one side as the worn bearing allows excessive movement of the hub assembly. At this stage, replacement is urgent — continued operation risks complete bearing seizure or, in extreme cases, wheel separation from the vehicle.
Diagnostic Methods for Confirming Hub Assembly Failure
Noise and vibration symptoms can have multiple causes — worn CV joints, uneven tire wear, warped brake rotors, and worn suspension bushings all produce similar sensations. Confirming that the hub assembly is the source before ordering parts avoids unnecessary replacement.
- Road test with load variation: Drive at a constant 50 mph and gently weave the vehicle from side to side while monitoring noise. If the noise increases when loading one specific corner and decreases when unloading it, the bearing on the loaded side is likely failing.
- Wheel spin test: With the vehicle safely raised, spin each wheel by hand and listen for roughness, grinding, or irregular resistance. Compare feel between sides — a failing bearing will feel noticeably rougher than its serviceable counterpart on the opposite axle.
- Dial indicator runout check: Mount a dial indicator against the hub flange face and rotate the hub by hand. Lateral runout exceeding 0.05 mm indicates a bearing that has developed internal play sufficient to cause brake rotor and tire runout problems.
- Thermal check: After a road test of 10 to 15 miles at normal speeds, carefully check hub temperature at all four corners using an infrared thermometer. A bearing generating excessive internal friction from wear will run noticeably hotter than the corresponding bearing on the opposite side — typically 20°C or more above ambient at the hub.
- OBD-II wheel speed data: Using a scan tool capable of displaying live wheel speed sensor data, compare the speed readings across all four channels at a constant road speed. A failing encoder ring or sensor gap variation will produce a fluctuating or erratic reading from the affected wheel, confirmed by the presence of ABS fault codes.
What to Evaluate When Buying a Replacement Hub Assembly
The replacement hub assembly market ranges from OEM (original equipment manufacturer) units through OEM-equivalent aftermarket products to low-cost import assemblies of highly variable quality. The following comparison highlights the key quality factors that differentiate reliable from unreliable replacement units:
| Quality Factor | What to Look For | Red Flags |
| Steel Grade and Heat Treatment | Through-hardened or case-hardened bearing steel to HRC 60–64 | No hardness specification provided; abnormally light unit weight |
| Grease Fill and Type | Lithium complex or polyurea grease rated for wide temperature range | Generic grease type listed; visible grease contamination around seals |
| ABS Encoder Ring | Verified pole count matching OEM specification for vehicle application | No pole count specification; ABS listed as optional or not included |
| Hub Flange Runout | Maximum lateral runout below 0.05 mm stated and tested | No runout specification provided; visible surface irregularities on flange |
| Seal Quality | Multi-lip NBR or PTFE seals with labyrinth outer shield | Single-lip seals; seals that appear loose or improperly seated |
| Certification and Testing | ISO/TS 16949 manufacturing certification; documented load and life testing | No manufacturing certification; warranty under 12 months |
| Bolt Pattern and Dimensions | Exact OEM dimensional match verified by application fitment database | Universal fit claims without vehicle-specific verification |
Installation Procedure and Critical Torque Specifications
Correct installation is as important as component quality in determining the service life of a replacement hub assembly. The most common causes of premature replacement failure are improper torque application, corrosion on mating surfaces, and incorrect ABS sensor gap setup — all preventable with the right procedure.
Surface Preparation Before Installation
Before installing a new hub assembly, thoroughly clean and inspect the knuckle bore or mounting face where the unit will seat. Surface corrosion between the hub assembly and knuckle is one of the primary causes of difficulty during future removal and can also create dimensional errors that induce bearing preload changes. Use a wire brush, flap wheel, or dedicated knuckle bore cleaning tool to remove all rust and scale from the mating surface. Apply a thin film of copper-based anti-seize compound to the mounting face — but not to the bolt threads unless the vehicle manufacturer specifically recommends it, as thread lubricants change the torque-clamp load relationship and can result in under-clamping at the specified torque value.
Torque Sequence and Values
Hub assembly mounting bolts must be torqued to the vehicle manufacturer's specification using a calibrated torque wrench — never an impact gun alone. Most front hub assemblies on passenger cars require mounting bolt torques in the range of 70 to 120 Nm, while rear assemblies are often similar. Always torque in a cross pattern to ensure even clamping load distribution across the flange. On vehicles where the hub assembly also retains the axle shaft via a central hub nut, the hub nut torque is typically substantially higher — commonly 180 to 280 Nm — and must be applied with the vehicle's weight on the wheel to prevent bearing loading during tightening. Always use a new hub nut of the correct specification, as these are typically single-use fasteners with a pre-applied locking patch that loses effectiveness after the first installation.
Factors That Affect Hub Assembly Service Life
The rated service life of a quality wheel bearing hub assembly — typically 100,000 to 150,000 miles under normal operating conditions — can be dramatically shortened by a number of identifiable factors. Understanding these allows drivers and fleet operators to take preventive action.
- Kerb and pothole impacts: A single heavy impact — such as striking a deep pothole at speed or mounting a kerb — can crack internal bearing raceways or deform the hub flange in ways that immediately accelerate wear. If a vehicle sustains a heavy impact, hub condition should be checked promptly even if no symptoms are immediately apparent.
- Vehicle overloading: Operating consistently at or above the vehicle's gross vehicle weight rating imposes bearing loads beyond design parameters, compressing the expected service interval significantly. Commercial vehicles and vans used for heavy payload work should have hub assemblies inspected at shorter intervals than the standard recommendation.
- High-pressure washing: Directing a pressure washer jet directly at the hub area can breach the bearing seals and force water and contaminants into the bearing grease — the most direct cause of premature corrosion-induced failure. Avoid directing pressure wash jets at hub assemblies, particularly on older vehicles where seals may have lost some elasticity.
- Misaligned suspension geometry: Significant camber or toe misalignment places asymmetric loading on the bearing, causing uneven raceway wear that reduces service life. If a hub assembly fails in under 30,000 miles, always have the suspension geometry checked before assuming the replacement unit is defective.
- Incorrect tire inflation: Chronically underinflated tires increase the cornering and lateral loads transmitted through the hub assembly on every bend. Maintaining correct tire pressures — checked monthly — is one of the simplest and most cost-effective ways to extend hub assembly service life across all four corners of the vehicle.
A wheel bearing hub assembly unit is not a consumable item to be replaced reactively when failure becomes impossible to ignore — it is a safety-critical structural component that rewards proactive monitoring and quality-focused replacement. Recognizing early symptoms, diagnosing correctly before ordering parts, specifying a quality replacement with verified ABS compatibility and dimensional accuracy, and installing with precise torque application and clean mating surfaces will deliver a repair that restores full vehicle safety and extends service intervals to the manufacturer's intended design life.
