

Content
- 1 What Is a Wheel Hub Spindle Kit and What Does It Include?
- 2 How the Wheel Hub Spindle Assembly Works Under Load
- 3 Warning Signs That Your Wheel Hub Spindle Kit Needs Attention
- 4 Choosing the Right Wheel Hub Spindle Kit for Your Application
- 5 Step-by-Step Overview of Wheel Hub Spindle Kit Installation
- 6 Maintenance Intervals and Extending Spindle Kit Service Life
What Is a Wheel Hub Spindle Kit and What Does It Include?
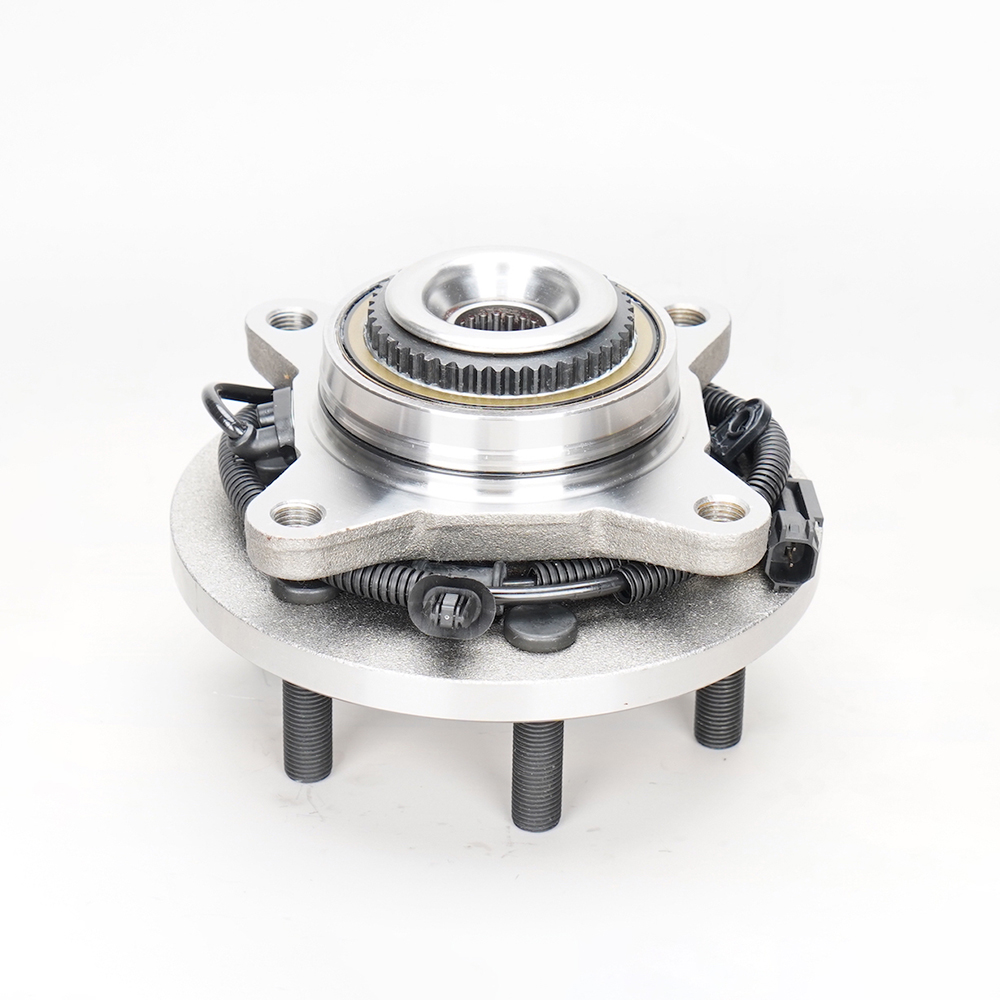
A wheel hub spindle kit is a collection of components that together form the central rotating assembly connecting your vehicle's wheel to its axle and suspension system. The spindle — also called the stub axle — is the fixed or rotating shaft around which the wheel hub and bearing assembly revolve. Depending on whether the vehicle uses a solid front axle, an independent suspension system, or a beam axle trailer configuration, the spindle kit may include different combinations of parts, but its core purpose remains consistent: to support the wheel, allow it to rotate freely, and transfer braking and steering forces reliably between the wheel and the chassis.
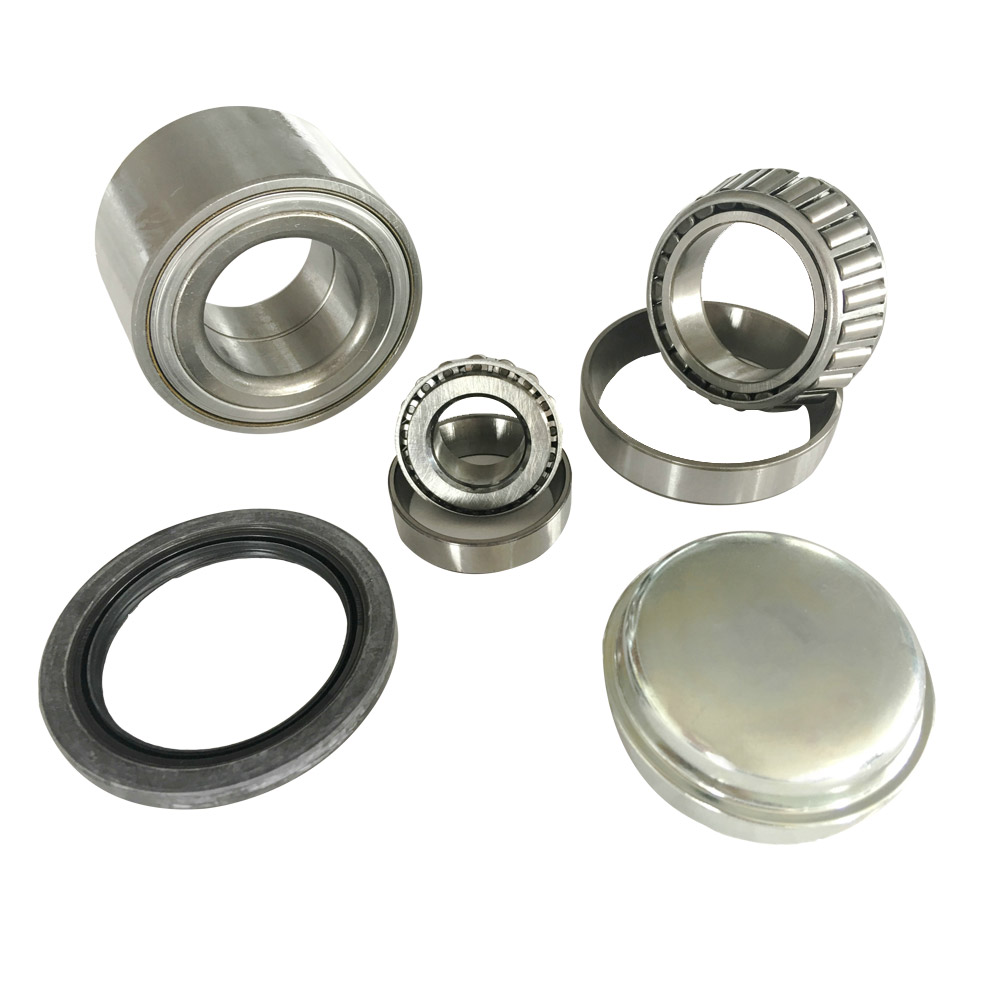
A typical wheel hub spindle kit for trailers, light trucks, or passenger vehicles may contain some or all of the following components depending on the application and manufacturer:
- Spindle shaft: The central axle component machined to precise tolerances that accepts the inner and outer wheel bearings.
- Inner and outer tapered roller bearings or ball bearings: These carry the radial and axial loads transmitted through the wheel and allow smooth rotation around the spindle.
- Bearing races (cups): Hardened steel races pressed into the hub bore that provide the running surface for the bearing rollers or balls.
- Grease seal: A lip seal fitted at the inboard end of the hub that retains bearing grease and prevents contamination from road debris, water, and mud.
- Spindle nut and washer: A castle nut or slotted hex nut threaded onto the spindle end to preload the bearings to the correct specification and retain the hub assembly on the spindle.
- Cotter pin or retaining clip: Inserted through the castle nut and spindle to prevent the nut from backing off during operation.
- Dust cap or grease cap: A pressed steel or rubber cap that covers the outboard end of the hub bore, protecting the outer bearing and spindle nut from contamination.
Some kits, particularly those designed for trailer axles or agricultural equipment, also include the hub drum or rotor, lug bolts, and a complete set of installation hardware. The exact composition varies by kit grade and application, so always verify the parts list before purchasing to ensure complete coverage for your specific repair or rebuild.

How the Wheel Hub Spindle Assembly Works Under Load
Understanding how the spindle assembly functions under real driving or towing conditions helps explain why each component in the kit matters and what happens when any one of them degrades. The spindle itself is a precision-machined shaft that is either welded or bolted to the axle housing (in the case of trailers and solid axles) or integral to the steering knuckle (in independent suspension vehicles). It does not rotate — instead, the wheel hub rotates around it on the bearing assembly.
The inner bearing carries the majority of the radial load — the downward weight of the vehicle pressing through the wheel — while the outer bearing manages axial (thrust) loads generated during cornering, lane changes, and uneven road surfaces. Correct bearing preload, set by proper torquing of the spindle nut, is critical: too loose allows the hub to develop play and rock on the spindle, accelerating bearing and race wear; too tight eliminates the necessary clearance for thermal expansion, causing overheating and premature bearing failure. This is why kits that include the correct-grade spindle nut and a new cotter pin are preferable to reusing worn hardware from a failed assembly.
Warning Signs That Your Wheel Hub Spindle Kit Needs Attention
Wheel hub spindle component wear rarely happens suddenly. In most cases, there are clear progressive warning signs that indicate a developing problem before catastrophic failure occurs. Recognizing these signs early and acting on them promptly is the difference between a straightforward bearing replacement and a complete hub, spindle, and axle shaft repair that costs several times as much.
Audible Warning Signs
A cyclic grinding, rumbling, or humming noise that changes in pitch or intensity with vehicle speed is one of the most reliable indicators of bearing wear. Unlike tire noise, which tends to be consistent, bearing noise often intensifies during cornering as the load shifts from one bearing to the other. A high-pitched squealing that stops when you apply light brake pressure can indicate a worn outer bearing race. Any knocking or clunking sensation felt through the steering wheel or floor on bumpy roads suggests significant bearing play has developed, which means the spindle itself may have already sustained damage from the loose assembly running against it.
Visual and Physical Inspection Signs
- Wheel play: With the vehicle safely raised and supported, grasp the tire at the 12 o'clock and 6 o'clock positions and attempt to rock it. Any detectable in-and-out or rocking movement indicates bearing looseness or a worn spindle journal.
- Grease leakage: Dark brown or black grease on the inside face of the wheel rim or on the backing plate indicates a failed grease seal, which has allowed bearing lubricant to escape and contaminants to enter.
- Heat discoloration: Blue or straw-colored discoloration on the spindle journal, bearing races, or hub bore suggests the assembly has run with insufficient lubrication or excessive preload, reaching temperatures that can alter the metallurgical hardness of the components.
- Pitting and spalling on bearing surfaces: When bearings are removed for inspection, pitting (small corrosion craters) or spalling (flaking of the hardened surface layer) on the rollers or races indicates fatigue failure and requires complete replacement of bearings and races together.
- Spindle journal damage: Grooves, scoring, or measurable out-of-round wear on the spindle itself — detectable with a micrometer — means the spindle must be replaced rather than simply fitting new bearings to a worn shaft.
Choosing the Right Wheel Hub Spindle Kit for Your Application
Selecting the correct spindle kit requires matching several specification parameters to your specific vehicle, trailer, or equipment. Using an incorrect or inferior kit can result in premature failure, unsafe wheel bearing preload, or components that physically do not fit the axle geometry. The following table outlines the key selection criteria:
| Selection Factor | What to Check | Why It Matters |
| Axle diameter and type | Measure spindle journal OD; identify solid or hollow axle | Determines bearing bore size and spindle nut thread specification |
| Load rating (GVW) | Vehicle or trailer gross vehicle weight rating | Ensures bearings are rated for the dynamic and static loads they will carry |
| Bearing type | Tapered roller vs. ball bearing; confirm OEM specification | Different bearing types have different preload and lubrication requirements |
| Hub bolt pattern | Number of studs and PCD (pitch circle diameter) | Must match the wheel and drum or rotor bolt pattern exactly |
| Brake system compatibility | Drum brake or disc brake; rotor hat depth if applicable | Hub flange dimensions must match the brake hardware fitted to the axle |
| Material and grade | Forged steel vs. cast iron spindle; bearing steel grade | Forged steel spindles offer greater fatigue resistance for heavy-duty use |
For trailer applications specifically, axle capacity ratings are stamped on the axle tube and must be matched to the spindle kit's load rating. Never fit a spindle kit rated for a lighter axle to a heavier trailer — the bearings will be undersized for the loads they experience, and failure can occur rapidly, especially under braking or on uneven roads. For passenger vehicles, using an OEM-equivalent or OEM-sourced kit is strongly recommended over budget aftermarket kits where bearing grade and heat treatment specifications are not transparently disclosed.
Step-by-Step Overview of Wheel Hub Spindle Kit Installation
While a full technical workshop procedure is beyond the scope of this guide, understanding the correct installation sequence helps both professional technicians and informed owners verify that the job is being done to the correct standard. Improper installation — particularly incorrect bearing preload and inadequate grease packing — is the primary cause of premature spindle kit failure after replacement.
Preparation and Cleaning
Before fitting any new components, the axle housing or steering knuckle must be thoroughly cleaned of all old grease, metallic debris from the failed bearing, and any corrosion on the spindle seating surfaces. If the spindle is being replaced, the weld preparation or mounting flange must be inspected for cracks or distortion. Any rough spots on the spindle journal where the new bearing inner race will seat should be polished smooth with fine emery cloth — never a grinder — to avoid introducing stress risers or dimensional inaccuracy.
Bearing and Seal Installation
- Press bearing races squarely into the hub bore using a proper bearing race driver or a suitable socket that contacts only the outer edge of the race. Never drive a race in at an angle or use impact tools directly on the race face.
- Pack tapered roller bearings fully with the correct grade of wheel bearing grease before installation, working the grease thoroughly between the rollers and cage by hand or with a bearing packer tool.
- Install the new grease seal squarely to the hub bore using a seal driver, ensuring the sealing lip faces inward toward the bearing. A cocked or damaged seal will fail immediately, allowing grease to escape and contaminants to enter.
Spindle Nut Torque and Preload Setting
This is the most critical step in the installation. The spindle nut preload procedure typically involves torquing the nut to a specified value while rotating the hub, then backing the nut off by a defined amount before aligning the cotter pin hole and inserting a new cotter pin. The exact torque specifications vary by axle size and bearing type and must be sourced from the vehicle or trailer manufacturer's service data — not generalized estimates. Always use a new cotter pin from the kit rather than reusing the old one, as a straightened and reinserted cotter pin provides unreliable retention.
Maintenance Intervals and Extending Spindle Kit Service Life
Unlike sealed hub bearing units used on many modern passenger cars, serviceable spindle assemblies with tapered roller bearings require periodic maintenance to achieve their full service life. For trailers, the industry standard recommendation is to inspect and repack wheel bearings every 12,000 km or once per season for trailers used near water — particularly boat trailers, which subject bearings to repeated thermal shock from hot bearings being submerged in cold water. For light trucks and agricultural equipment, bearing inspection at every brake service interval is a practical minimum standard.
Using the correct grease specification is equally important for longevity. High-temperature, lithium-complex, or polyurea-based wheel bearing greases rated NLGI Grade 2 are appropriate for most applications. Mixing incompatible grease types — for example, adding calcium-complex grease to a hub previously packed with lithium grease — can cause the grease to separate, lose its structural consistency, and fail to lubricate effectively under operating temperatures. When in doubt, fully clean and repack the hub with fresh grease of a single consistent type rather than topping up an unknown existing product.
Investing in a quality wheel hub spindle kit from a reputable manufacturer, installing it correctly, and following the recommended maintenance schedule delivers a reliable, safe wheel assembly that will serve for years without unplanned failure. Cutting costs on bearing grade or skipping the grease seal replacement when bearings are serviced are the two most common errors that lead to repeat repairs — both of which are entirely avoidable with the right kit and proper practice.
